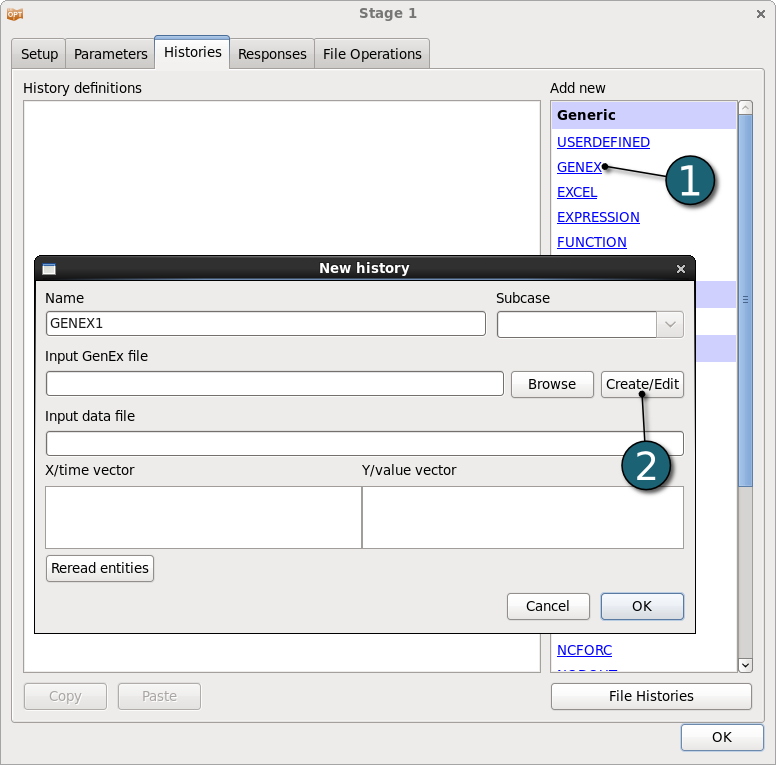
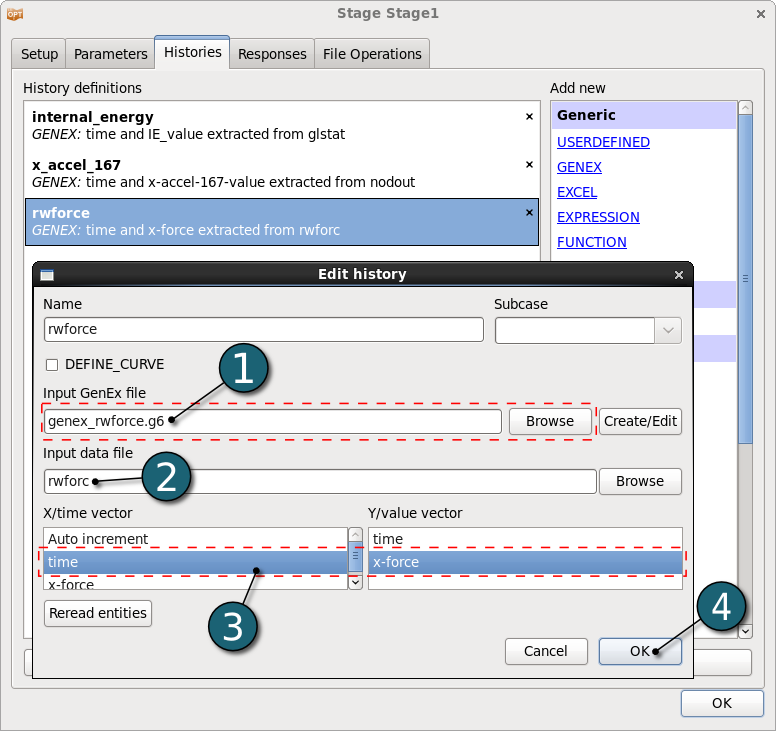
- From the Histories panel select GENEX.
- Create a new .g6 file by clicking the Create/Edit button.
( When first starting GenEx, there will be two predefined anchors in the tree on the left, Start of File and End of File. It is not possible to change or remove these two anchors.)
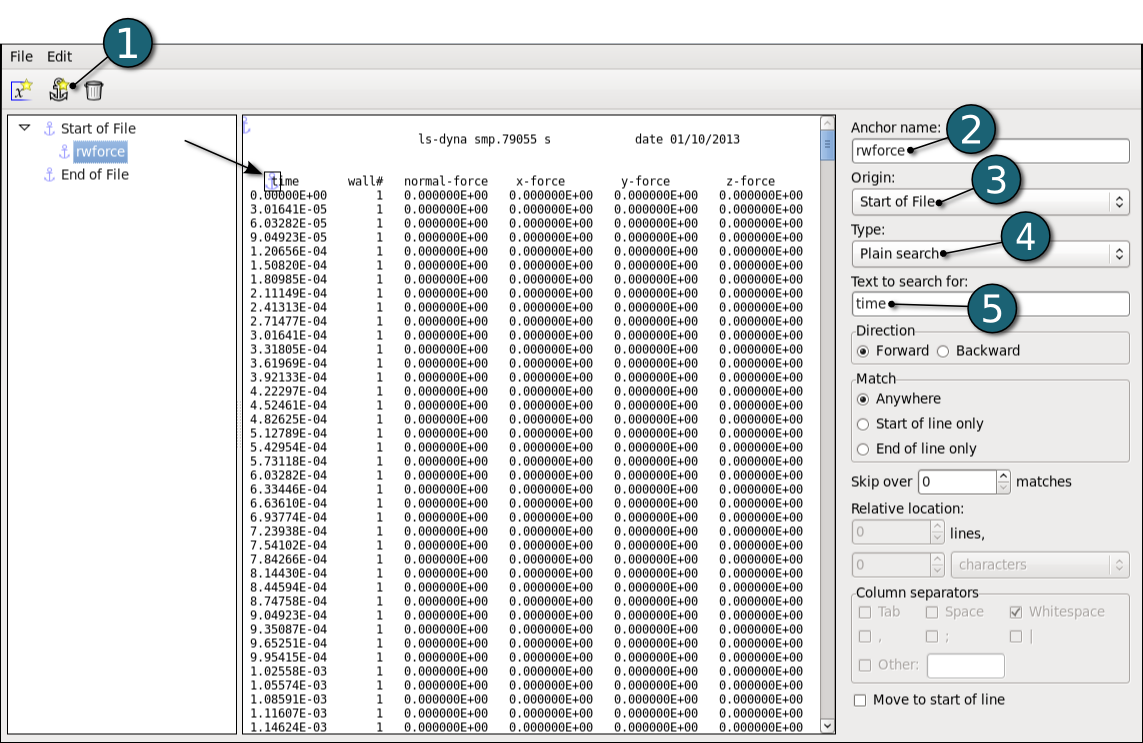
- In the GenEx GUI select rwforc as the input file by using File→Select input file. The rwforc file is displayed in the middle.
We first start by creating the anchor rwforce:
This anchor will be the base for further anchors.
- Define an anchor by clicking on the anchor icon
 or using the Edit option. or using the Edit option.
- Type the Anchor name rwforce.
- Select Start of File as Origin.
- Select Plain search as Type.
- Type Text to search for: "time". Press the "Enter" key.
Define the Entities:
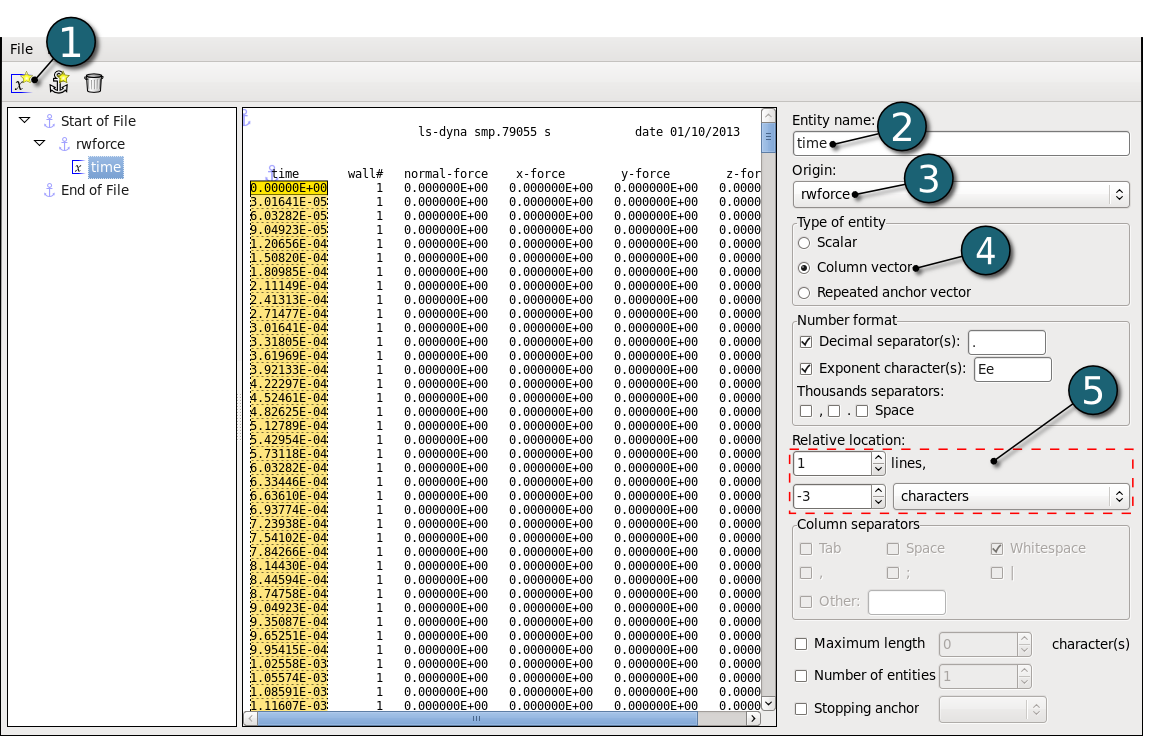
- Define a new entity by using the leftmost x-icon
 or the Edit option. or the Edit option.
- Type the Entity name time.
- Select as Origin the anchor rwforce.
- Select Type of the entity Column vector.
- Define the Relative location 1 line below and 3 characters left.
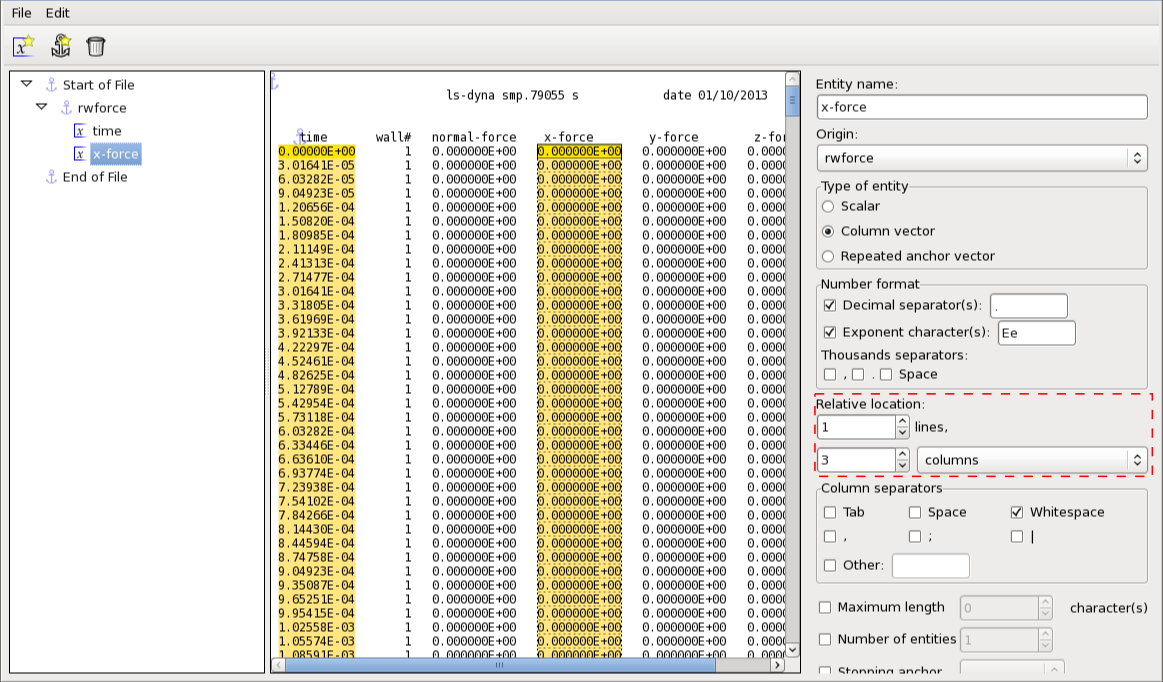
Define the entity x-force in a similar way to entitiy time by changing only the Relative location as 1 line below and 3 column right.
- We are now finished with the GenEx part and the file can be saved.
Using GenEx for extracting histories:
- Browse the saved GenEx file for extracting histories.
- Define the rwforc input file.
- Extracting histories with GenEx is very similar to using GenEx for responses. The main difference is that you have to select two entities in the Histories page, one for the x-axis and one for the y-axis. Select time as x-axis and x-force for the y-axis.
- Click on the OK button to complete the history definition.
When creating the entities in GenEx they need to be either Column vector or Repeated anchor vector to be used for history extraction.
|

